|
October 2011 |
|
| DROPimage Red Line and Right Line Options | |
|
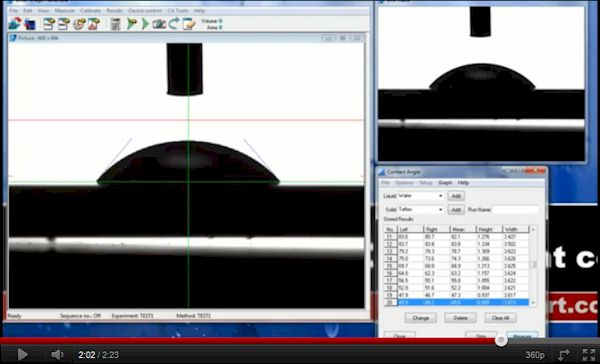
My daughter is learning to drive and she's using my car which has a manual transmission to practice. Taking off from a dead stop on an uphill road with cars behind you can be nerve-racking - especially if your skill with the clutch is limited. The same is true with any powerful tool: your success is dependent on your mastery of the tool. In the case of our current-generation contact angle tools, a working knowledge of our DROPimage software is critical to your success in collecting accurate and meaningful data. So, today my goal is to share with you some tips and tricks for success if you are a user of any edition of DROPimage (CA, Standard, or Advanced). First, never assume that your instrument is properly calibrated. You should personally calibrate it. If you're not sure how, watch this video: http://youtu.be/ffDagzI7D2M. On a daily basis, you should check your instrument calibration. The test results should not deviate more than 1.0% from the stored results. If they do, you should recalibrate. If you are fastidious, you will log your calibration results with a time and date stamp. In this manner, any results can be traced back to specific calibration values. Next, you will find that the software will work best when the main window is not full-screen but rather is sized to just fit the main static image window as shown in the video below. This will allow you to place the various tools and dialog boxes on the screen also illustrated in the video. Third, I don't know why this is, but a lot of folks have a real hard time understanding the red line and right line options. So, my primary goal today is to explain the difference and then you can watch the video to see how to use these options correctly. In the case of the right line, this option should only be selected if you have a tip or needle embedded in the drop - e.g., if you are measuring advancing and receding contact angle. In the video below, we use the right line option while the needle is in the drop. While taking measurements, we add volume to the drop for the advancing contact angle and then we retract volume for the receding. Note that after you turn on the right line option and then click start, you will get two vertical lines. The left (green) line is controlled with the left mouse button. The right (yellow) line is controlled with the right mouse button. These two lines are put on the side of the needle to filter it out of the view. It's not necessary that the lines touch the needle. When you are done or if you are measuring a sessile drop without a needle or tip in the drop, the right line option should be turned off. The red line is used to filter out anything in the image window which is above it. For example, if your tip or needle is still in the image window after dispensing a drop, the red line can be placed above the drop but below the needle in order to filter the needle out. In order to control the red line, hold down the Ctrl key on the keyboard while moving your left mouse button. In the video below, we use both the right line and the red line options. Click on the video or copy and paste: http://youtu.be/PKRMzSK3xTU
One final note, if you get stuck using
DROPimage, consider these resources: The on-line help menu, the
DROPimage User Guide (there is a softcopy of your software documentation
in the c:\DROPimage folder on your
goniometer PC), our growing library of videos (http://www.youtube.com/user/ramehart#g/u),
or email us your question (http://www.ramehart.com/contactus.htm).
Be sure to include what edition and version of software you are using
and as much detail as possible about your issue. |
|
| Materials Research Society Call for Papers | |
|
The Materials Research Society has announced its Call for Papers for the 2012 Spring Meeting and Exhibit which will be held in San Francisco April 9-13. To learn more, or to submit an abstract, please visit: http://www.mrs.org/spring2012/ |
|
|
|