|
February 2022 |
| The Rose Petal Effect Explained |
|
Some 25 years ago, Wilhelm Barthlott,
a German botanist, discovered and explained what today is called the
Lotus Effect - i.e., the wetting behavior of a lotus leaf which
exhibits a very high apparent contact angle and very low contact
angle hysteresis. This behavior also provides a self-cleaning
property and is explained by a hierarchal structure made up of both
nanostructures and microstructures as illustrated in the graphic
below. Over the past two decades, myriad researchers have invested
countless resources attempting to develop nanosurfaces patterned
after the humble lotus leaf. These surfaces which produce contact
angles in excess of 150° and emulate the Cassie-state behavior of
the lotus leaf are said to be superhydrophobic.
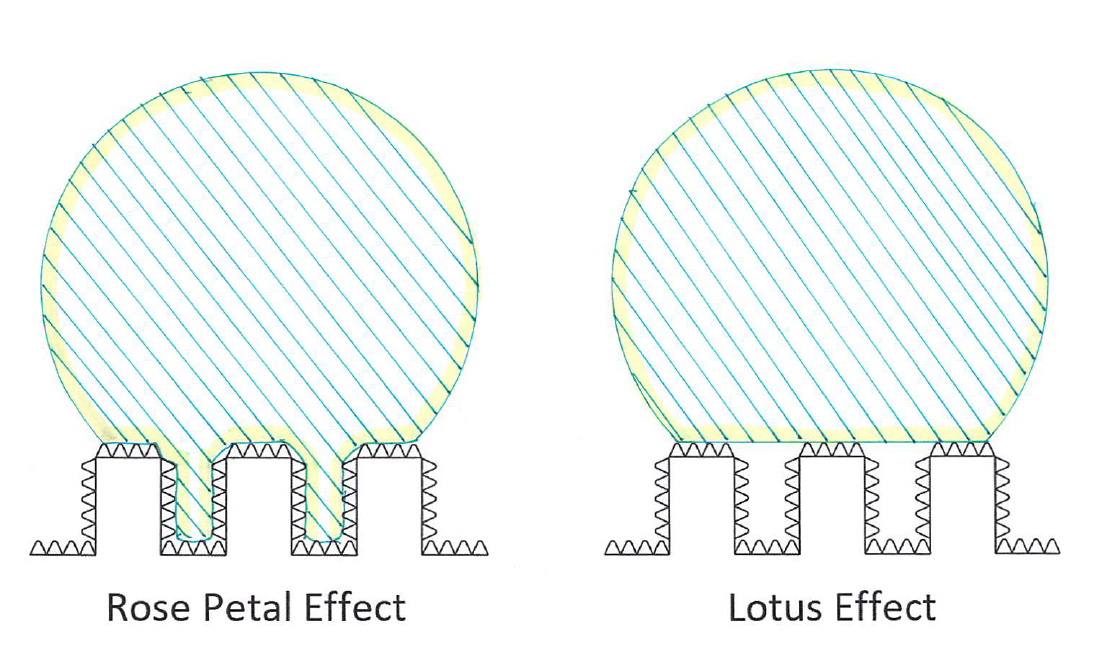
Not all superhydrophobic surfaces are created equal, however. In fact, not all surfaces that exhibit an apparent contact angle greater than 150° are even superhydrophobic. Enter the rose petal. While the surface of the rose petal exhibits hierarchal topology similar to that of the lotus leaf, the resulting wetting behavior is quite different. The rose petal effect exists when the large microstructure valleys fill with water from the drop (in a Wenzel-like state) while the smaller nanostructures remain free of water (in a Cassie-type state) as shown in the graphic below. With the lotus effect, the voids between both the nanostructures and microstructures are filled with air in a true Cassie state.
While the apparent contact angle is very high, the contact angle hysteresis, unlike the lotus leaf, is also extremely high. And while a water droplet on a lotus leaf will roll off with a very low tilt angle, the same droplet on a rose petal will stick to the surface even when tilted 90°. This is often referred to as a Cassie impregnated wetting regime. Some would argue that surfaces that demonstrate the rose petal effect are not truly superhydrophobic despite exhibiting water contact angles in excess of 150°. They are commonly referred to as exhibiting pseudosuperhydrophobicity - how's that for a long word? The rose petal effect also helps us understand the need to look at more than simply the static apparent contact angle. Take two surfaces which we will call Surface A and Surface B. Each surface has a water contact angle in the neighborhood of 160°. However, when we measure advancing and receding contact angle using the tilting plate method, we discover that Surface A has a very small contact angle hysteresis, under 5° and an accompanying small roll off angle, also under 5°. When we take the same advancing and receding measurement on Surface B, we discover that the drop pins to the surface and remains in place all the way to a tilt angle of 90°. Further, we discover that the corresponding contact angle hysteresis is rather large in the neighborhood of 70°. Thus what appears to be two identical surfaces at the onset after measuring the static contact angle proves to not be the case after measuring the roll-off angle and contact angle hysteresis. We conclude that Surface A is is truly superhydrophobic due to the lotus effect while Surface B is a pseudosuperhydrophobic surface due to the rose petal effect. Here in New Jersey there is a fuzzy weed which has a very high water contact angle.1 Further investigation, however, reveals a large contact angle hysteresis and thus we conclude that like the rose petal, a Cassie impregnated wetting regime is present. Researchers who are designing nanosurfaces have discovered that by making small adjustments to the surface topology, the wetting regime can be modified. For example, by adjusting the spacing and height of the microstructures, the nature of the wetting regime can be controlled. It's the microstructure that controls the contact angle hysteresis while the nanostructure controls the relative hydrophobicity. While many superhydrophobic surfaces may look the same and even have the same water contact angle, it's not until we look closer at the roll-off angle and contact angle hysteresis that we can determine the underlying wetting regime and distinguish between surfaces that exhibit the lotus effect and those that exhibit the rose petal effect. Notes 1 See our
December 2011 Newsletter. |
| Automated Dispensing System Tips and Tricks |
|
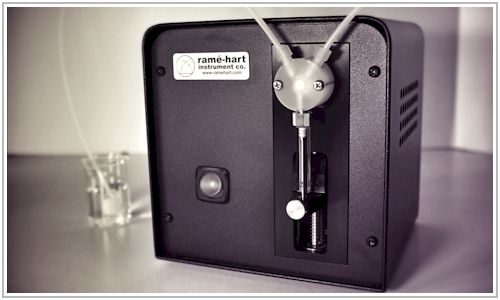
The ramé-hart
Automated Dispensing System has to be one of our least understood
products. If your system includes
one, you will likely
find this article useful. If your system does not include an
Automated Dispensing System, you may wish to add one after reviewing
it's capabilities. Here are some of the most common support questions:
Q. I'm using DROPimage Advanced and when I click on Device Control, the option for Drop volume control is grayed out. How do I turn it on? A. If you start DROPimage and the dispenser is turned off, then DROPimage will also turn off the device in the software. To turn it back on, make sure the Automated Dispensing System is turned on and then go to Edit > Options and check on Drop volume control. If prompted to reinitialize or reset the dispenser, say Yes. The option for Drop volume control will now appear in the Device Control pull-down or on the toolbar. Q. How do I clean the tubing after using different liquids? A. The Automated Dispensing System is designed to be hydraulic. That is, the tubing and syringe should be primed with water only and if you wish to dispense a non-water liquid, it should occupy the disposable tip only. This video shows you how to do it. When you're ready to switch to a different liquid, simply remove the tip, put a new one on and load it up. Q. How do I make a sessile drop using the Automated Dispensing System? A. Their are two common ways to produce a sessile drop. The first method, which is also the preferred method, is to slowly produce a hanging or pendant drop. And then lower the fixture until the drop touches the surface and releases. You can see this sequence in this video. The key to success is to control the speed of the dispenser. This is done by adjusting the "Full stroke time". For water and most liquids, the default speed of 5.0 seconds (which is the time it would take to make a full stroke) is adequate. There are some liquids that will need to be dispensed more slowly. In that case, you will want to increase the full stroke time - to 10 or more seconds. The second method is to eject the drop onto the surface. To do this, you will need to increase the dispenser speed by changing the full stroke time to 2 or 3 seconds, depending on the liquid. Q. I get an error unless I remove the tip from the image window. Is there a way to overcome this? And is it possible to leave the tip in the drop and take measurements? A. If your needle or tip is still in the view, you will want to turn on the red line option. If the needle or tip is left in the drop (e.g., to measure advancing and receding contact angle using the add/remove volume method), then you will want to use the right line option. This video shows how to properly use both the red line and the right line options. Q. Help, my Automated Dispensing System is moving the liquid the wrong direction. A. Most likely you have the tubing installed backwards. The tubing to the reservoir should connect to the left side of the valve while the tubing to the dispensing tip should be connected to the right side. Also, check that you have the valve set to the appropriate mode (in the Drop Volume Control dialog) - either Reservoir or Drop. Q. I set the output step to 20µL but only 4µL is ejected. A. The installed syringe must match the syringe identified in the Drop volume control. In this case, you likely have a 50µL syringe installed but the software is set for 250µL. To fix this, go to the Drop Volume Control dialog and click on "Change syringe" and then set it to 50µL. Q. My syringe is old and getting hard to move and the tubing is starting to crack. It's been in use many years. How do I replace these parts? A. Here is the replacement tubing. You will need a blunt end and a standard interconnect for most systems. However, if you are using a tilting base, then you may want the extra long interconnect. Here are the syringes. Q. I'm trying to use the Automated Dispensing System with our Environmental Fixture, but the tip does not reach in far enough. What should I do? A. You will need the Extended Fixture Adapter (p/n 100-30-09). You can order it here. Q. I need an Automated Dispensing System, how do I get one? A. Please contact us today. We'd be happy to provide you with a quotation or direct you to the appropriate agent if outside of the US. Q. Can the Automated Dispensing System work stand alone? A. Yes, we have a number of customers who use the Automated Dispensing System in a stand-alone environment. We can provide at no extra cost the stand-alone software with the purchase of the dispenser. All you need to provide is a PC with a USB or serial port. Do you have any additional question regarding the Automated Dispensing System? If so, please contact us. We would be happy to answer any question. |
|
Regards,
Carl Clegg |