What features in DROPimage have you been missing out on?
Our commitment to offer world-class instruments means we are constantly thinking about the user's experience and potential improvements. Over the years, many features have been added to the DROPimage software that help users maximize measurement repeatability and ease of use. We find that many customers are not aware of these features when they reach out for technical support. Today, we will highlight six features that users often miss.
Note that some of these features have been added to more recent versions of the software, and some are only available in certain editions of the software, such as DROPimage Pro and DROPimage Advanced. If you are interested in upgrading your software to access features you are currently missing, contact us and we can provide a quotation.
User Guide in the DROPimage folder
We provide a user guide with every instrument we ship. The guide includes a section on the version of DROPimage that came with your instrument. This section is highly instructional and provides important details about how the various tools in DROPimage are intended to be used.
If you have misplaced your user guide, an electronic copy is available with the installed files for the software. To access it, navigate to the DROPimage folder, typically located in the C: drive on the computer that came with your instrument. A PDF file with the name of your edition of DROPimage is the user guide.
Click to enlarge
Circular Baseline
The circular baseline feature in DROPimage Advanced allows for easy measurements on convex and concave surfaces. To learn how to use this feature, watch this video. Another video that shows how to measure advancing and receding contact angles on a curved surface with a captive bubble can be viewed here.
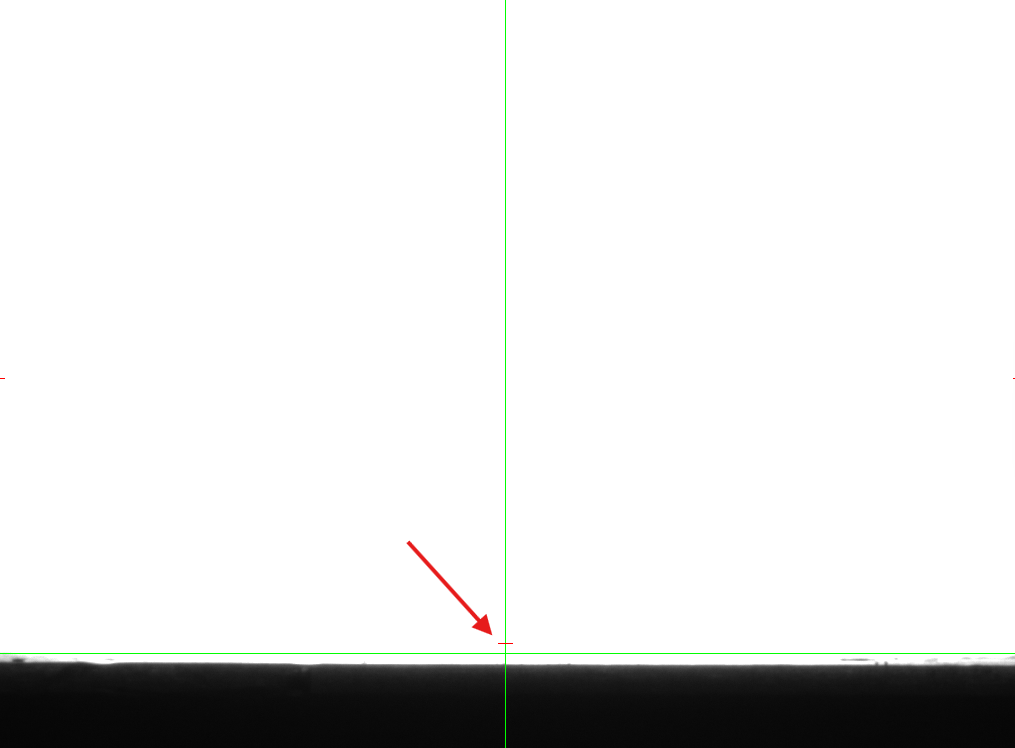
Trigger
Having a hard time getting a dynamic contact angle measurement to start at the right time? The trigger function in DROPimage Advanced makes it easy to automate the start of an experiment. To enable the trigger, check "Use trigger" in the measurement box when starting an experiment. A small red line will appear above the baseline. Once the droplet crosses the red line, the experiment will be initiated.
Click to enlarge
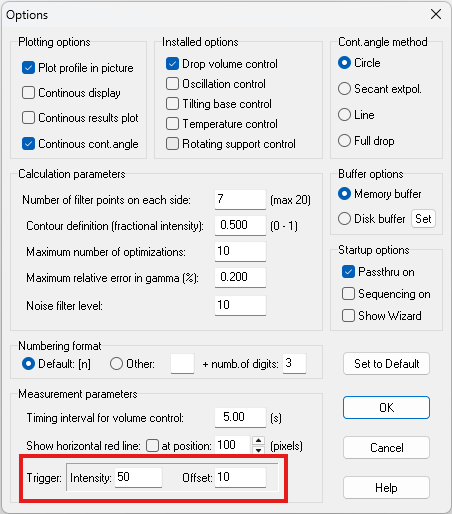
The trigger settings can be adjusted in the Options menu (Edit > Options).
Click to enlarge
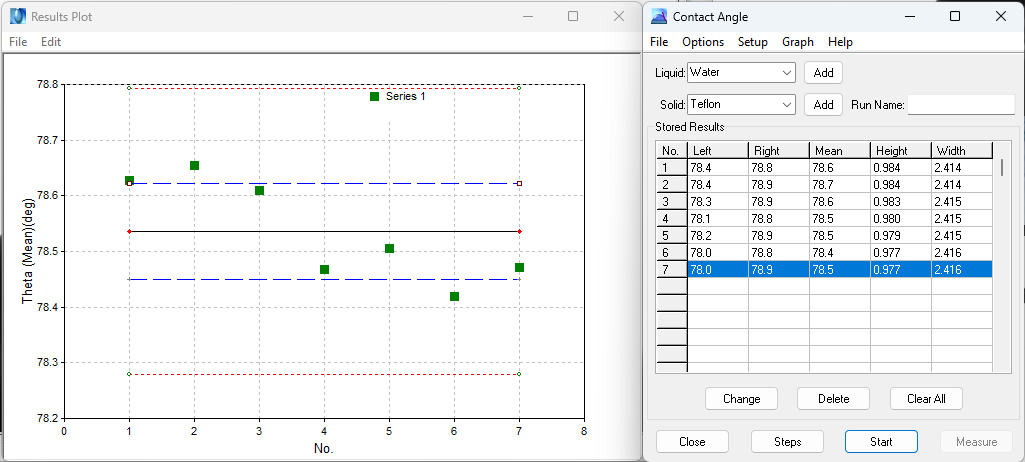
Auto-Plotting
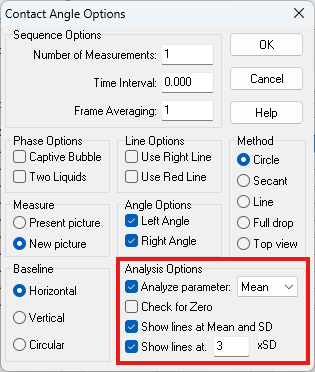
In a recent version of DROPimage Advanced, a feature to enable auto-plotting was added to the Contact Angle tool. In the Options menu, an analysis option allows you to turn on automatic plotting of a desired parameter by checking "Analyze parameter" and selecting the desired parameter. Mean and standard deviation lines can also be displayed on the plot.
Click to enlarge
Points will be added to the plot as new measurements are taken. Erroneous measurements can be removed by right-clicking on the outlying point. When a new measurement is started, there will be an option to clear or retain the current plot.
Click to enlarge
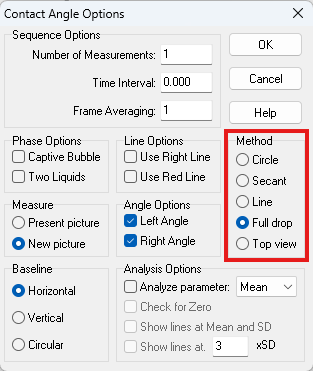
Contact Angle Measurement Methods
The default method for measuring contact angles in DROPimage fits the drop profile to a circular profile. This is a robust method that provides high accuracy in almost all conditions. Other methods are also available for use in DROPimage Advanced. These methods can be selected in the Options menu or in the Contact Angle tool Options menu.
Click to enlarge
The Secant method uses linear extrapolation and is useful for measuring contact angles while using tilting, as the drop edge no longer follows a circular profile. The Line method can be used for calibration purposes or with very noisy data. The Full Drop method fits the drop profile to the Young-Laplace equation and can produce highly accurate results, especially for very high contact angles, but is sensitive to disturbances.
Add and Remove Volume with Steps
When the Automated Dispensing System is installed in DROPimage Pro or DROPimage Advanced, the option to use Steps becomes available in the Contact Angle tool. This video shows how to use the Steps function to measure advancing and receding contact angles for maximum repeatability with the Add/Remove Volume method.
Thank you for your continued business,
The ramé-hart Team
World Leader in Surface Science Instruments